Every sound we hear, from the softest whisper to the loudest thunderclap, is an intricate dance of invisible energy. But what if you could see that dance? That's precisely what understanding audio frequencies & waveforms allows us to do, transforming abstract sound into tangible visual information. For anyone serious about crafting compelling audio, from podcast producers to music engineers, this visual language is your secret weapon for better sound editing.
This isn't just theory; it's a practical roadmap to truly seeing your sound and making informed, impactful editing decisions.
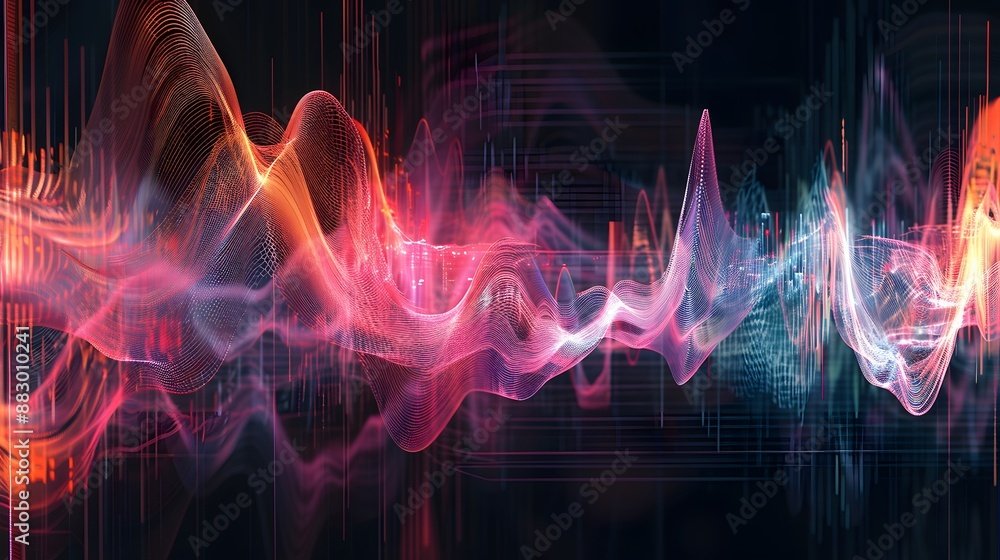
At a Glance: Your Quick Guide to Waveforms
- Waveforms are visual maps of sound: They show how a sound wave moves through time.
- Frequency = Pitch, Amplitude = Loudness: These are the two most critical characteristics you'll manipulate.
- Different shapes, different sounds: Sine, Square, Triangle, and Sawtooth waves each have unique sonic qualities.
- Digital audio is sampled: It converts continuous analog sound into discrete data points.
- Visualizing waveforms is non-negotiable: It helps you spot issues and balance your mix before you even hit play.
- Amplitude is your king in editing: Managing levels is paramount to avoid distortion and achieve clarity.
Decoding the Invisible: What Are Audio Waveforms, Really?
Imagine tossing a pebble into a still pond. The ripples that spread across the surface are a perfect visual analogy for a sound wave – energy moving through a medium. An audio waveform is essentially a graph of that energy, charting a sound wave's journey and its characteristics over time.
While sound waves themselves are longitudinal (meaning the vibrations move parallel to the direction of the wave, like a slinky being pushed), we commonly depict waveforms as transverse (vibrations perpendicular to direction, like ocean waves) because it makes them much easier to visualize and understand in editing software. This visual representation is the bedrock of all sound editing and engineering, allowing us to see the peaks and valleys, the quiet moments and the loud bursts, that constitute a sonic event.
Sound itself is a mechanical wave, an oscillating pressure that travels through mediums like air, water, or even solid walls. These pressure variations, when within our hearing range, are what our ears interpret as sound.
The Four Cornerstones of Sound: Frequency, Amplitude, Wavelength, Velocity
To truly master sound editing, you need to grasp the fundamental characteristics that define every waveform. Think of these as the primary colors on your sonic palette.
1. Frequency: The Soul of Pitch
Frequency is the number of complete wave cycles that occur in one second. It's measured in Hertz (Hz), and it's the characteristic that directly determines the pitch of a sound.
- Low Frequency: Means fewer cycles per second, resulting in a longer wavelength and a lower pitch (think deep bass, rumble, or male voices).
- High Frequency: Means more cycles per second, resulting in a shorter wavelength and a higher pitch (think cymbals, bird calls, or sibilant 's' sounds).
The human ear is incredibly sensitive, capable of perceiving sounds within a vast range: roughly 20 Hz to 20,000 Hz (20 kHz). Sounds below 20 Hz are infrasound (felt more than heard), and those above 20 kHz are ultrasound. When you adjust the EQ on a track, you're directly manipulating specific frequency ranges to shape its tonal character. For instance, boosting frequencies around 100-200 Hz can add warmth to a voice, while cutting frequencies around 2-4 kHz can reduce harshness.
2. Wavelength: The Distance Between the Waves
Wavelength (λ) is the physical distance between two successive, identical points in a wave cycle – for example, from one wave crest to the next. As you might expect, wavelength is inversely related to frequency. A high-frequency sound will have a short wavelength, and a low-frequency sound will have a long wavelength. While you don't directly edit wavelength in your DAW, understanding its relationship with frequency helps explain why certain frequencies behave differently in acoustic spaces.
3. Amplitude: The Measure of Loudness
Amplitude is the height of the wave, measured from the centerline to its peak. This characteristic determines the loudness or intensity of the sound.
- Higher Amplitude: Signifies a louder, more powerful sound.
- Lower Amplitude: Signifies a quieter, softer sound.
In your DAW, amplitude is visually represented by the vertical size of the waveform. A tall, bushy waveform means a loud sound, while a flat, thin line indicates silence or very low volume. Amplitude can be measured in a couple of ways: - Zero to Peak: This measures the absolute maximum signal level, useful for identifying potential clipping (where the signal exceeds the system's capacity).
- Root Mean Square (RMS): This provides a more meaningful average level, better reflecting how human hearing perceives loudness. It's crucial for understanding the overall perceived power of a sound, particularly for compression and leveling.
Of all the waveform characteristics, amplitude is arguably the most critical for audio editing. It's what you're constantly adjusting when you trim, fade, compress, or set gain levels, all to achieve a balanced, distortion-free mix.
4. Velocity: The Speed of Sound
Velocity (V) refers to the speed and direction at which a sound wave travels through a medium. Sound doesn't travel at a constant speed everywhere; it varies depending on the medium's properties. For instance, in dry air at 20°C (68°F), sound moves at approximately 344 meters per second (about 767 mph). It travels faster through denser mediums like water or solids.
The relationship between these properties is elegant and fundamental: Velocity (V) = Frequency (f) x Wavelength (λ). While you won't directly manipulate velocity in your editing software, understanding it helps explain phenomena like echoes (delayed reflections) and how sound behaves in different environments.
Beyond the Basics: Harmonics & Overtones – The Color of Sound
If frequency gives a sound its fundamental pitch, harmonics and overtones give it its unique color, texture, and character – what we call timbre. Without them, every instrument playing the same note would sound identical.
- Fundamental Frequency: This is the lowest frequency present in a sound, which our brain perceives as the primary pitch of a note.
- Harmonics: These are integer multiples of the fundamental frequency. If the fundamental is 100 Hz, its harmonics would be 200 Hz, 300 Hz, 400 Hz, and so on. They contribute significantly to the richness and "musicality" of a sound.
- Overtones: These are all frequencies in a sound higher than the fundamental. While all harmonics are overtones, not all overtones are necessarily harmonics (they can be inharmonic). Inharmonic overtones, like those found in bells or some percussion, contribute to more complex, less "musical" sounds.
The presence, strength, and decay patterns of these harmonics and overtones are what allow us to distinguish between a flute and a violin playing the exact same note. They add depth, complexity, and a sense of realism that's vital for compelling audio.
The Shape of Sound: Exploring Common Waveform Types
Just as different colors evoke different moods, different waveform shapes produce distinctly different sonic characteristics. These basic shapes are the building blocks of synthetic sounds and understanding them offers insight into the nature of various instruments and effects. If you've ever experimented with an online tone generator, you've likely encountered these pure shapes.
1. Sine Waveforms: The Purest Tone
- Visual: A smooth, continuous, symmetrical curve.
- Sonic Signature: The simplest type of waveform, containing only a single frequency with no harmonics or overtones. It produces a pure, clear, often gentle tone.
- Use Cases: Sine waves are fundamental as the building blocks for more complex synthesized sounds. They're also used for testing audio equipment or as the basis for sub-bass elements in music.
2. Square Waveforms: Sharp & Buzzy
- Visual: A distinct on-off, blocky pattern with sharp, instantaneous transitions between maximum and minimum amplitude.
- Sonic Signature: Rich in odd harmonics (3rd, 5th, 7th, etc.), which gives them a sharp, hollow, buzzy, and often electronic sound.
- Use Cases: Widely recognized in electronic music, retro video game soundtracks (chiptune), and for creating punchy bass or lead synth sounds.
3. Triangle Waveforms: Mellow & Balanced
- Visual: Symmetrical, pointed peaks and troughs, resembling a zigzag pattern, with linear ramps between them.
- Sonic Signature: Contains odd harmonics like square waves, but with a faster decay in amplitude for higher harmonics, resulting in a softer, mellower, and more balanced tone than a square wave.
- Use Cases: Often used for more harmonically interesting synth pads, bass lines, or in retro and video game music where a slightly softer digital sound is desired.
4. Sawtooth Waveforms: Bright & Edgy
- Visual: Resembles the teeth of a saw, with a gradual rise to a peak followed by an immediate, sharp drop, or vice versa.
- Sonic Signature: Contains all integer multiples of the fundamental frequency (both odd and even harmonics), giving it a very full, bright, edgy, and often brassy or buzzy quality.
- Use Cases: Incredibly versatile, sawtooth waves are a staple for creating powerful lead synth sounds, rich bass lines, and aggressive pads in electronic music genres.
Understanding these foundational shapes helps you predict how certain synthesized sounds will behave and even begin to deconstruct the timbral qualities of acoustic instruments into their component parts.
Your Room, Your Sound: The Impact of Acoustics
It's one thing to understand a waveform on a screen; it's another to hear it in a physical space. Acoustics – the study of how sound behaves in an enclosed environment – profoundly impacts how waveforms are perceived. Your editing efforts can be made or broken by the room you're in.
The size, shape, and materials of a room all affect how sound waves interact with their surroundings:
- Absorption: Soft materials (curtains, carpets, acoustic panels) absorb sound energy, reducing reflections and making the sound "drier" and clearer.
- Reflection: Hard, flat surfaces (bare walls, glass, concrete) reflect sound waves, causing them to bounce around the room. This can lead to unwanted coloration of your audio.
- Diffusion: Irregular surfaces or specialized diffusers scatter sound waves in multiple directions, breaking up harsh reflections and creating a more even sound field without excessive absorption.
This interplay gives rise to common phenomena: - Echoes: These are distinct, delayed reflections of a sound wave. You hear the original sound, then a clear repeat.
- Reverberation: Unlike discrete echoes, reverberation is the persistence of sound in a space after the original sound source has stopped. It's a complex wash of countless reflections that gradually decay, giving a sense of space and ambience.
When you're editing, especially when applying effects like reverb, being aware of your monitoring environment's acoustics is critical. A room with too many reflections can make your mixes sound muddy or overly resonant, leading to poor decisions that won't translate well to other listening environments.
From Analog Flow to Digital Precision: The Waveform's Journey
The sound waves that travel through the air are continuous – they never stop or start abruptly (unless the source does). This is the realm of analog audio. But in the modern world of DAWs and digital files, we deal with digital waveforms, which are a sampled representation of that continuous flow.
Analog Waveforms: The Continuous Stream
Analog waveforms are continuous representations of sound waves, capturing all their infinite nuances, subtle variations, and smooth transitions. Think of the grooves on a vinyl record or the magnetic patterns on a cassette tape. They directly mirror the pressure changes in the air.
Digital Waveforms: The Sampled Snapshot
Digital waveforms, by contrast, are discrete representations. They're created by taking "snapshots" of the analog waveform at regular intervals and converting those snapshots into numerical data. This process is called sampling, and it relies on two key parameters:
- Sampling Rate (Hz): This determines how often the sound wave is sampled per second. A higher sampling rate means more snapshots are taken, resulting in a more accurate digital representation of the original analog wave. Common rates are 44.1 kHz (CD quality) and 48 kHz (video/film standard), but professional audio often uses 96 kHz or even higher.
- Bit Depth: This determines the resolution or dynamic range of each individual sample. A higher bit depth allows for more amplitude values to be captured, leading to a wider dynamic range, less quantization noise, and a more detailed, accurate representation of the sound's loudness variations. Common bit depths are 16-bit and 24-bit.
The trade-off? Higher sampling rates and bit depths provide more accurate, high-fidelity representations of sound, but they also generate significantly larger file sizes, requiring more storage space and processing power.
Capturing the Bursts: Transients
A crucial aspect of digital audio is the accurate capture of transients. These are the short, high-energy bursts of sound that occur at the very beginning of a sound wave – the initial attack of a drum hit, the pluck of a guitar string, or the 'p' in a spoken word. Accurate transient capture is vital for preserving the punch, clarity, and realism of digital sound. Poor sampling or compression can blur transients, making sounds less defined.
Your Digital Workbench: Digital Audio Workstations (DAWs)
Digital Audio Workstations (DAWs) like Pro Tools, Logic Pro, Ableton Live, or Audacity are the essential software environments for manipulating digital waveforms. They provide the visual interface and tools to:
- See the Waveform: Visually inspect amplitude, identify clipping, and locate specific sonic events.
- Edit Precisely: Cut, paste, crossfade, and rearrange audio segments with frame-level accuracy.
- Apply Effects: Use plugins to process sound, adding compression, EQ, reverb, delay, and more.
- Mix & Master: Balance levels, pan sounds in the stereo field, and prepare your final audio for distribution.
Without a solid grasp of waveforms, navigating a DAW is like trying to paint in the dark.
Mastering Your Mix: Essential Waveform Editing Techniques
Now that we understand what waveforms are, let's explore how you actively manipulate them in your DAW to sculpt your sound. Every click and drag in your audio editor is a direct interaction with the waveform.
Basic Manipulation: The Foundations
These are your everyday tools for cleaning up and structuring audio:
- Trimming: This involves altering the start and end points of an audio clip. Visually, you're shortening or extending the waveform to remove dead air, unwanted noises, or perfectly fit a rhythm.
- Fading: Creating smooth transitions by gradually increasing (fade-in) or decreasing (fade-out) the amplitude of a waveform. This prevents abrupt cuts that can sound jarring or clicky. You'll see the waveform's height smoothly change at the beginning or end of a clip.
- Adjusting Gain: Directly controlling the overall amplitude (loudness) of a waveform. This is your primary tool for setting initial levels, making sure each track is audible without being too loud or too quiet.
Advanced Editing: Shaping the Sound
Once the basics are solid, these techniques let you fine-tune the character of your audio:
- Compression: This technique reduces the dynamic range of a sound, making the loud parts quieter and the quiet parts louder. Visually, it can make a waveform appear more uniform in height, bringing consistency to vocals or taming unruly drums. It's crucial for achieving a balanced mix.
- Equalization (EQ): This is the process of boosting or cutting specific frequency ranges to shape the tonal balance of a sound. You're directly manipulating the frequency spectrum, enhancing clarity, reducing muddiness, or adding sparkle. Visually, you won't see the waveform change shape in the same way as gain, but the frequency analysis view in your EQ plugin will show the real-time effect.
Audio Restoration & Enhancement: Polishing Your Tracks
Waveforms aren't just for fixing; they're for elevating:
- Removing Unwanted Noise: Visually identifying and eliminating extraneous elements like hiss, clicks, hums, or even background chatter. Specialized noise reduction tools often analyze the "noise print" of a waveform to intelligently remove it.
- Stereo Widening: Manipulating the stereo image to make a sound appear wider or narrower in the sound field. Waveform analysis tools can show you the stereo spread.
- Adding Reverb or Delay: Creating a sense of space or echo. While these are effects, observing the waveform after applying them will show the decay tails of the sound.
- Harmonic Exciters: These tools subtly add upper harmonics to a sound, making it brighter, richer, and more present without simply boosting high frequencies.
Common Mistakes to Avoid in Waveform Editing
Even experienced editors can stumble. Watch out for these pitfalls:
- Over-compression: Squeezing the dynamic range too much can make audio sound flat, lifeless, and unnatural.
- Excessive EQ: Drastic boosts or cuts can introduce phase issues, make sounds harsh or thin, or create an unnatural tonal balance. A little goes a long way.
- Ignoring Phase Issues: When two similar waveforms are out of phase, they can cancel each other out, leading to a thin, hollow, or missing sound. Visually aligning waveforms can help identify and correct these problems.
Effective Editing Tips for Better Sound
Practice makes perfect, but smart practice makes perfect faster:
- Start with Clean Audio: The best editing can't fix fundamentally flawed source material. Get it right at the recording stage.
- Monitor Levels Constantly: Keep an eye on your meters to prevent clipping (where the waveform peaks exceed the digital limit, causing harsh distortion). The amplitude of your waveform is your direct indicator.
- Use EQ and Compression Sparingly: Subtlety is key. Make small, incremental adjustments.
- Listen on Different Systems: What sounds good on your studio monitors might sound terrible on earbuds or car speakers. Cross-reference!
- Save Original Files: Always keep an unprocessed backup. You never know when you'll need to go back.
- Take Breaks: Ear fatigue is real. Step away, clear your head, and come back with fresh ears.
- Trust Your Ears (But Verify with Your Eyes): The waveform is a guide, but your ears are the ultimate judge. However, using your eyes to confirm what you think you're hearing can be incredibly powerful.
Seeing What You Hear: Waveform Analysis in Mixing & Mastering
In the final stages of audio production, waveform analysis becomes as critical as pure listening. It's your visual feedback loop, helping you confirm, diagnose, and refine your mix and master.
Analyzing Tracks: Spotting Problems Before They're Heard
Before you even press play, visually inspecting waveforms across your tracks can reveal issues that might be hard to pinpoint by ear alone:
- Clipping: Look for flattened tops or bottoms of waveforms, indicating digital distortion. This is a common culprit for harsh-sounding audio.
- Phase Problems: If two similar tracks (e.g., two microphones on a drum kit) have waveforms that look like mirror images, they might be out of phase, leading to cancellation and a hollow sound.
- Timing Discrepancies: Visually align drum hits, vocal entrances, or instrument chords to ensure they're perfectly in sync, especially critical in multitrack recordings.
- Dynamic Balance: Observe the overall amplitude envelopes of different tracks. Are your vocals consistently loud enough? Is the bass guitar disappearing in quiet sections?
Balancing Tracks: Your Visual Guide to Harmony
Waveforms provide an indispensable visual reference when adjusting levels, panning, and dynamics:
- Level Adjustments: Visually compare the average amplitude of different tracks. If the lead vocal waveform looks significantly smaller than the backing music, you know where to start adjusting gain.
- Panning Decisions: While panning is an auditory effect, understanding how individual tracks contribute to the overall stereo spread can be informed by their visual presence and how they interact with other elements.
- Dynamics Processing: When applying compression or expansion, the waveform will visibly change, providing instant feedback on how the dynamic range is being reshaped. This helps you ensure instruments complement each other rather than fighting for space.
Stereo Imaging: Crafting Width and Depth
Waveforms in stereo tracks often display information for both the left and right channels. By analyzing this visual data, you can make informed decisions about:
- Stereo Spread: How wide or narrow a sound appears. If both channels of a stereo track have nearly identical waveforms, it will sound very centered. If they show significant differences, it will sound wide.
- Stereo Enhancement: Using tools to widen or narrow a sound, or even create artificial stereo from a mono source. The resulting waveforms will visually confirm the changes to the stereo field.
The Amplitude Advantage: Why Levels Matter Most
We've covered a lot, but if there's one takeaway to tattoo onto your editing brain, it's this: the amplitude of a waveform is the most critical aspect for audio editing.
Why? Because amplitude directly equates to loudness, and managing loudness is fundamental to every aspect of sound production:
- Avoiding Clipping: Keeping your amplitudes within the digital limits prevents distortion.
- Achieving a Balanced Mix: Ensuring every instrument and vocal track sits perfectly in the sonic landscape.
- Maintaining Dynamic Range: Controlling the difference between the loudest and quietest parts of your audio.
- Ensuring Intelligibility: Making sure vocals are clear and prominent.
While frequency determines the pitch or tonal quality of a sound, it's amplitude that dictates its presence, its impact, and its ability to coexist harmoniously with other sounds. Skilled waveform editing, with a keen eye on amplitude, is what allows you to balance levels, remove noise, enhance clarity, correct timing, and ultimately, drastically improve the overall quality of your sound.
Your Next Step: Transforming Sound with Confidence
Understanding audio frequencies and waveforms isn't just about technical jargon; it's about gaining a superpower. It's the ability to visualize the invisible, to diagnose issues before they become problems, and to sculpt sound with an artist's precision and a surgeon's care.
Armed with this knowledge, you're no longer guessing in the dark. You can approach your editing sessions with clarity, confidence, and a far deeper appreciation for the intricate dance of sound. So open your DAW, load up some audio, and start seeing what you hear. The journey to truly exceptional sound editing begins with this visual language. Practice these concepts, and you'll soon find yourself transforming ordinary audio into extraordinary sonic experiences.